
What is Framer?
Framer is a no-code website builder. It allows you to create professional-looking websites in a few just minutes, without writing any lines of code. Its drag-and-drop canvas makes it easy to use and lets you build the perfect website for your needs, whether it is for a SaaS company, a personal website, or a blog.
What is PraiseHive?
PraiseHive is tool that helps businesses collect, manage and showcase testimonials from their satisfied customers. PraiseHive allows businesses to use the power of social proof to drive more sales. With testimonials, businesses can build trust by showing why their customers love them.
In this guide, we will explain with a step-by-step tutorial how you can add testimonials and reviews to your Framer website, using PraiseHive.
Step-by-step tutorial
Learn how you can easily embed your PraiseHive widget on your Framer website and showcase your favorite customer testimonials with this step-by-step tutorial.
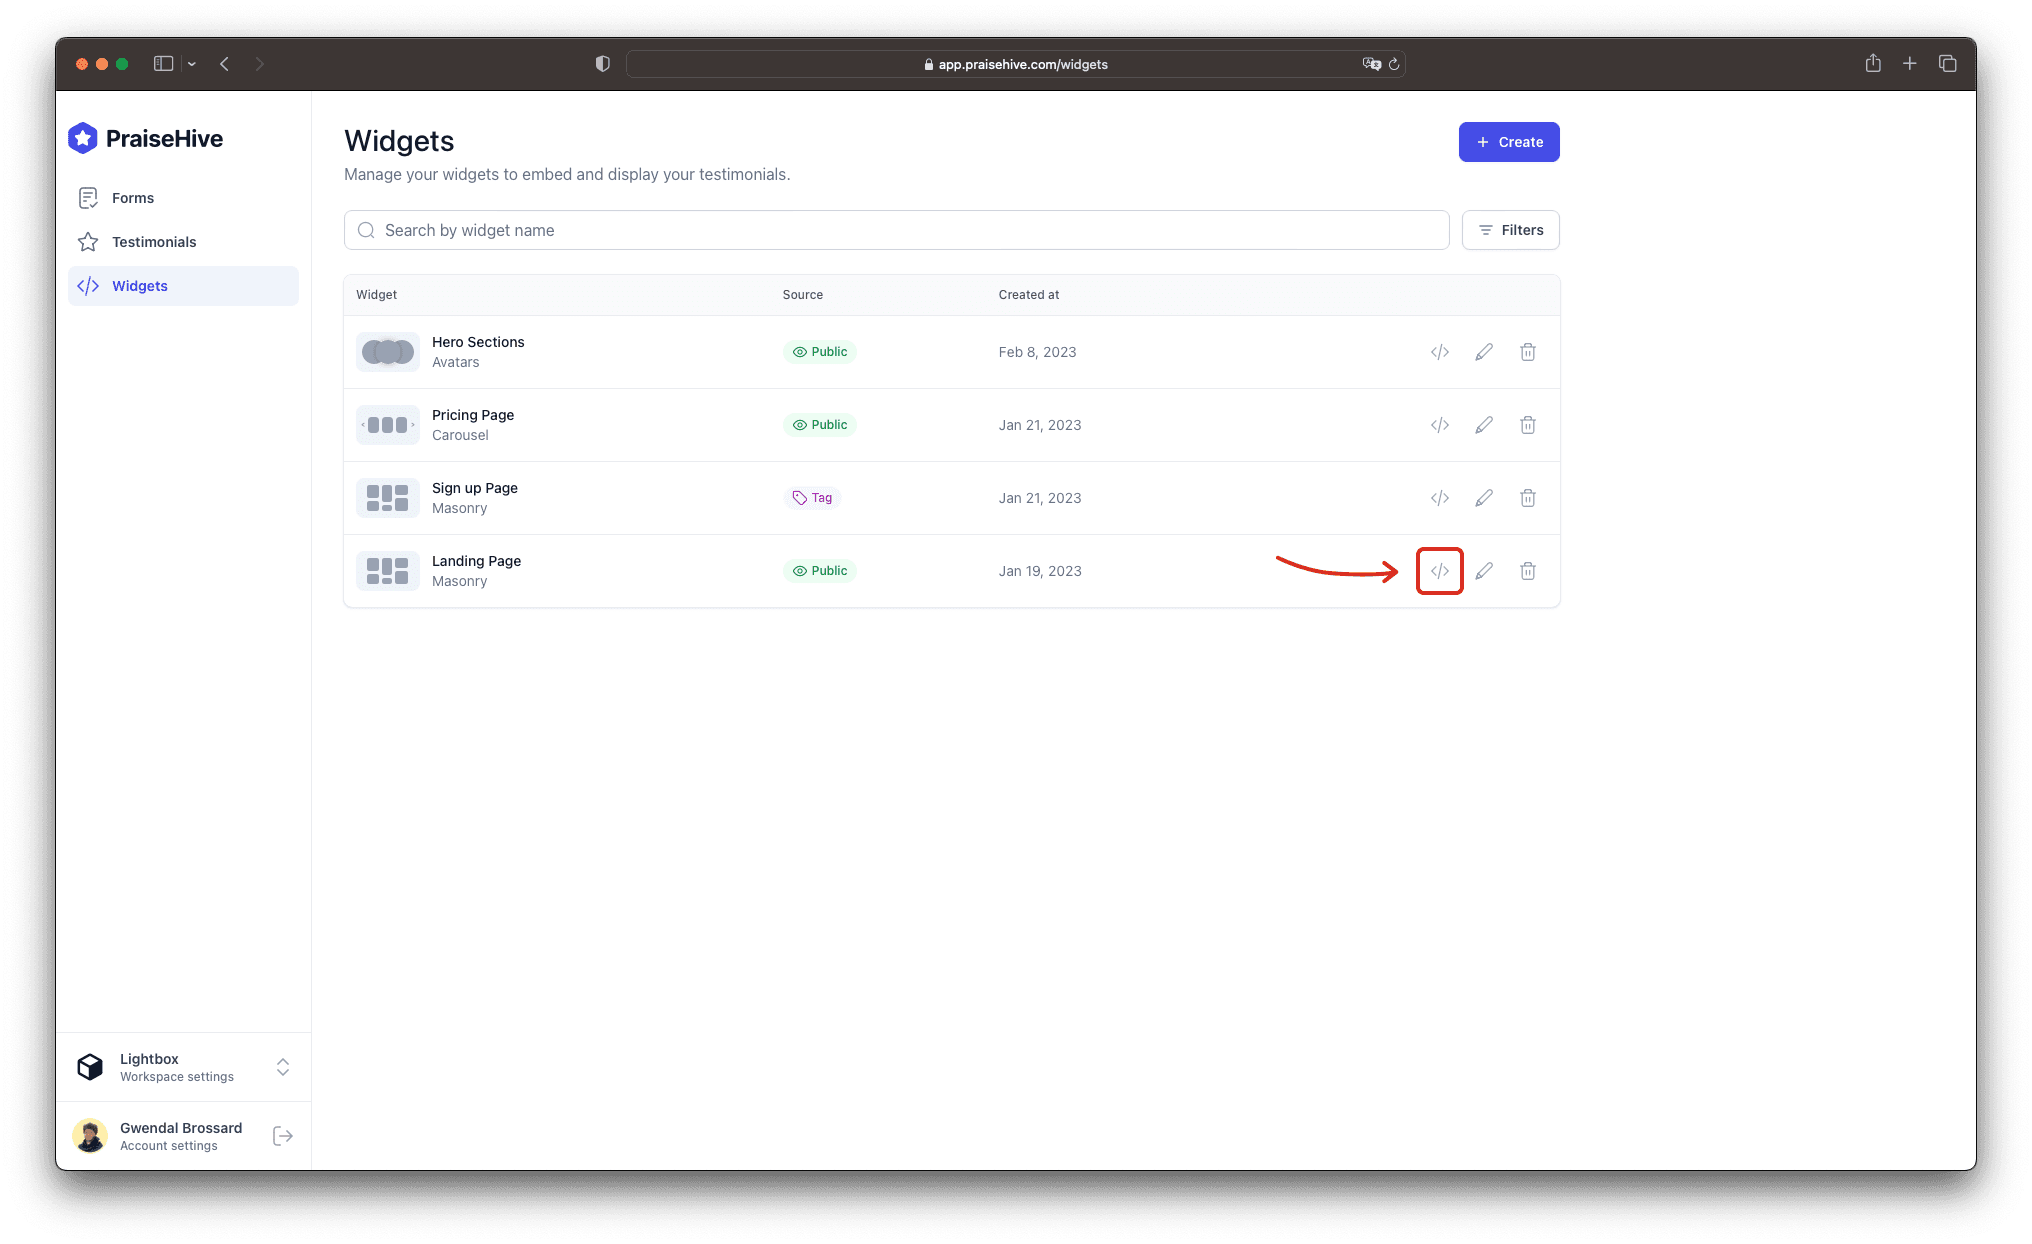
Step 1 - Get your embeddable code from your widget
In the dashboard, go to the widgets page, and click on the Embed Widget button Alternatively, as shown in the video tutorial above, you can click on the Edit button, and once you are on the edit page of your widget, you can click on the Embed button.
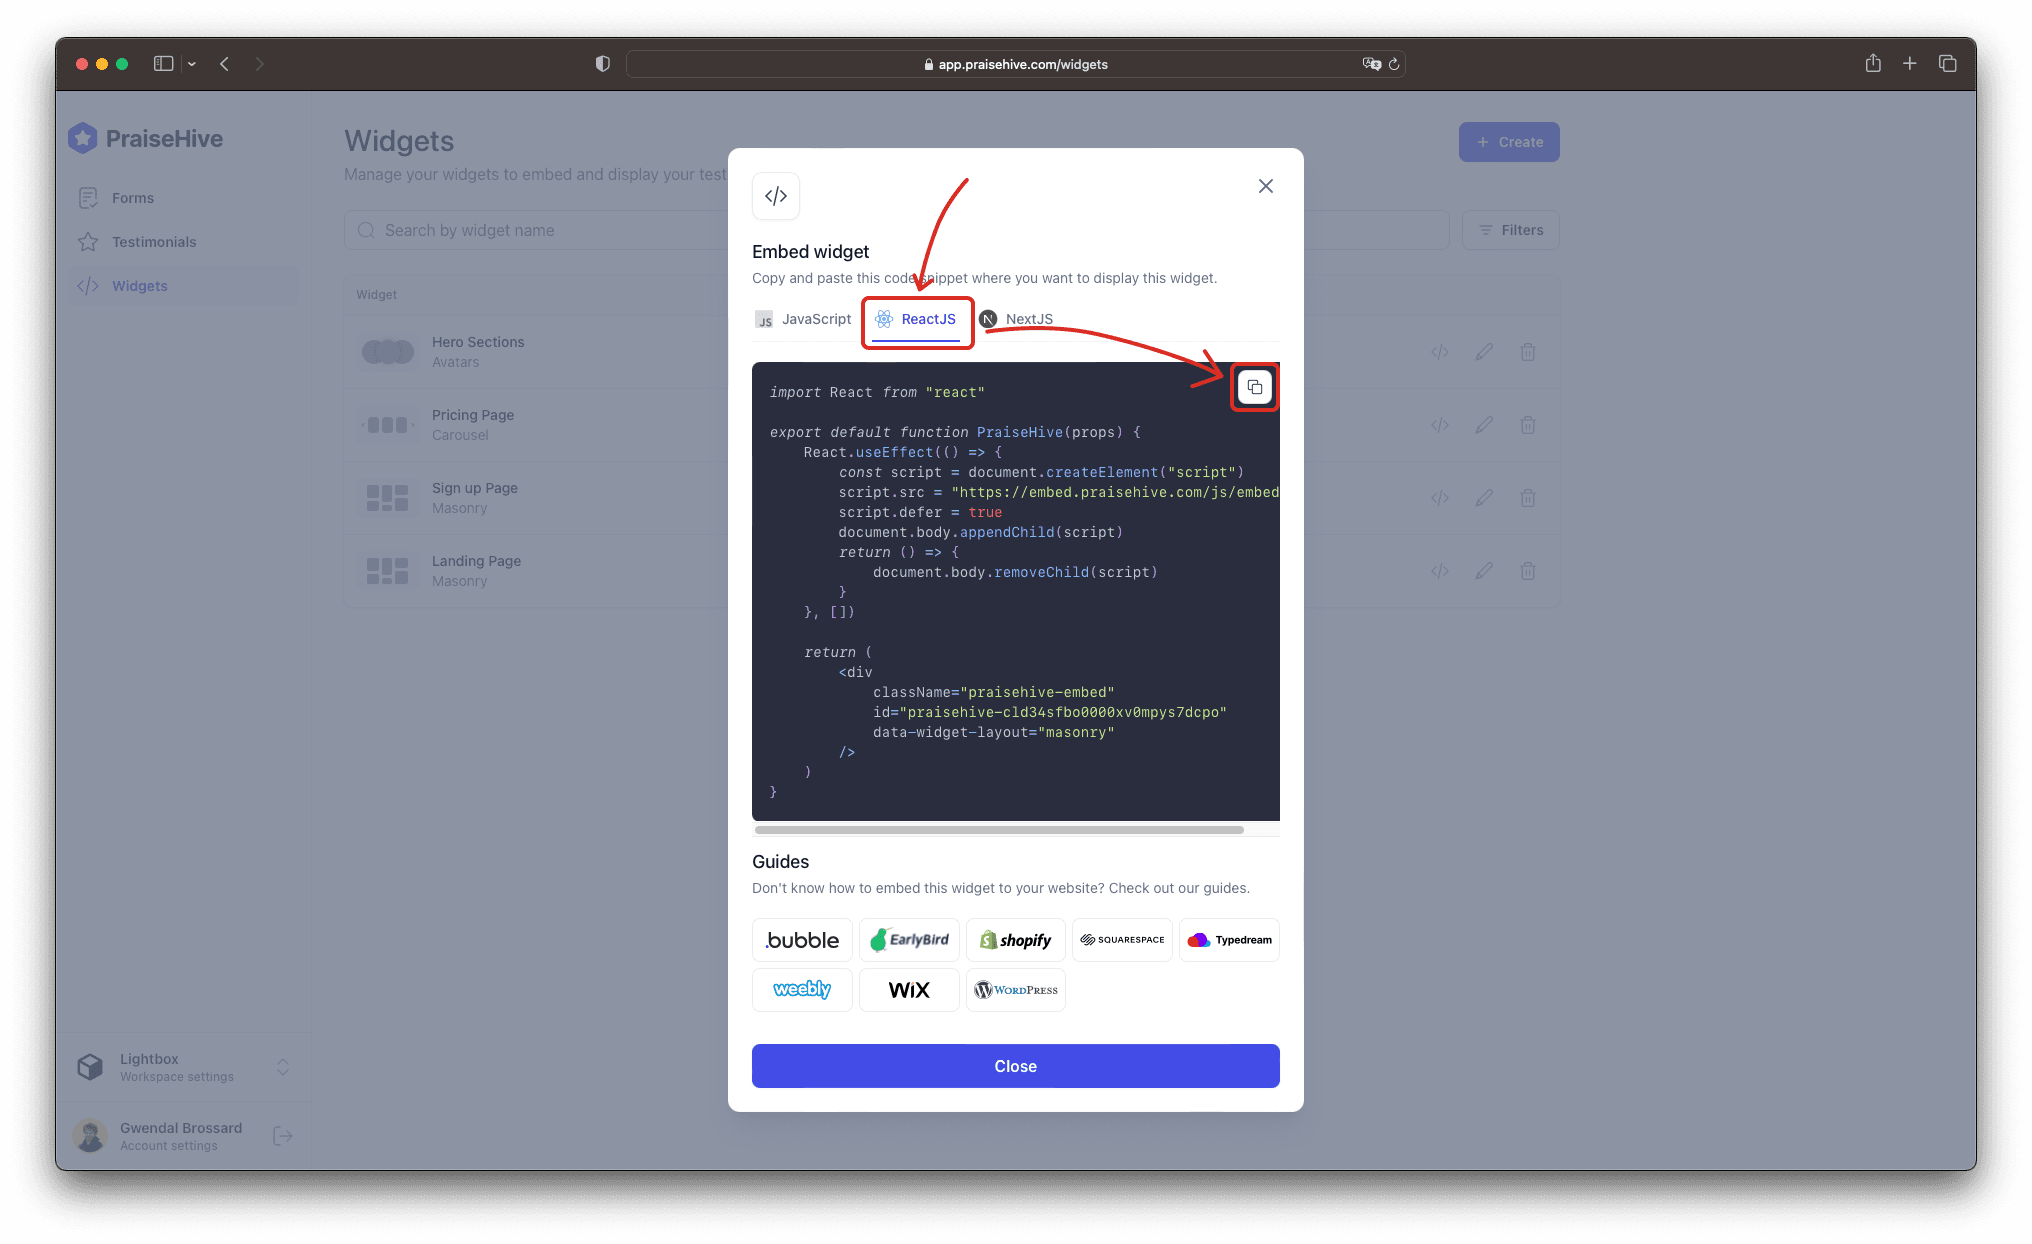
Then, a modal will pop up on your screen. Click on the ReactJS tab and copy the embeddable code by clicking on the Copy button.
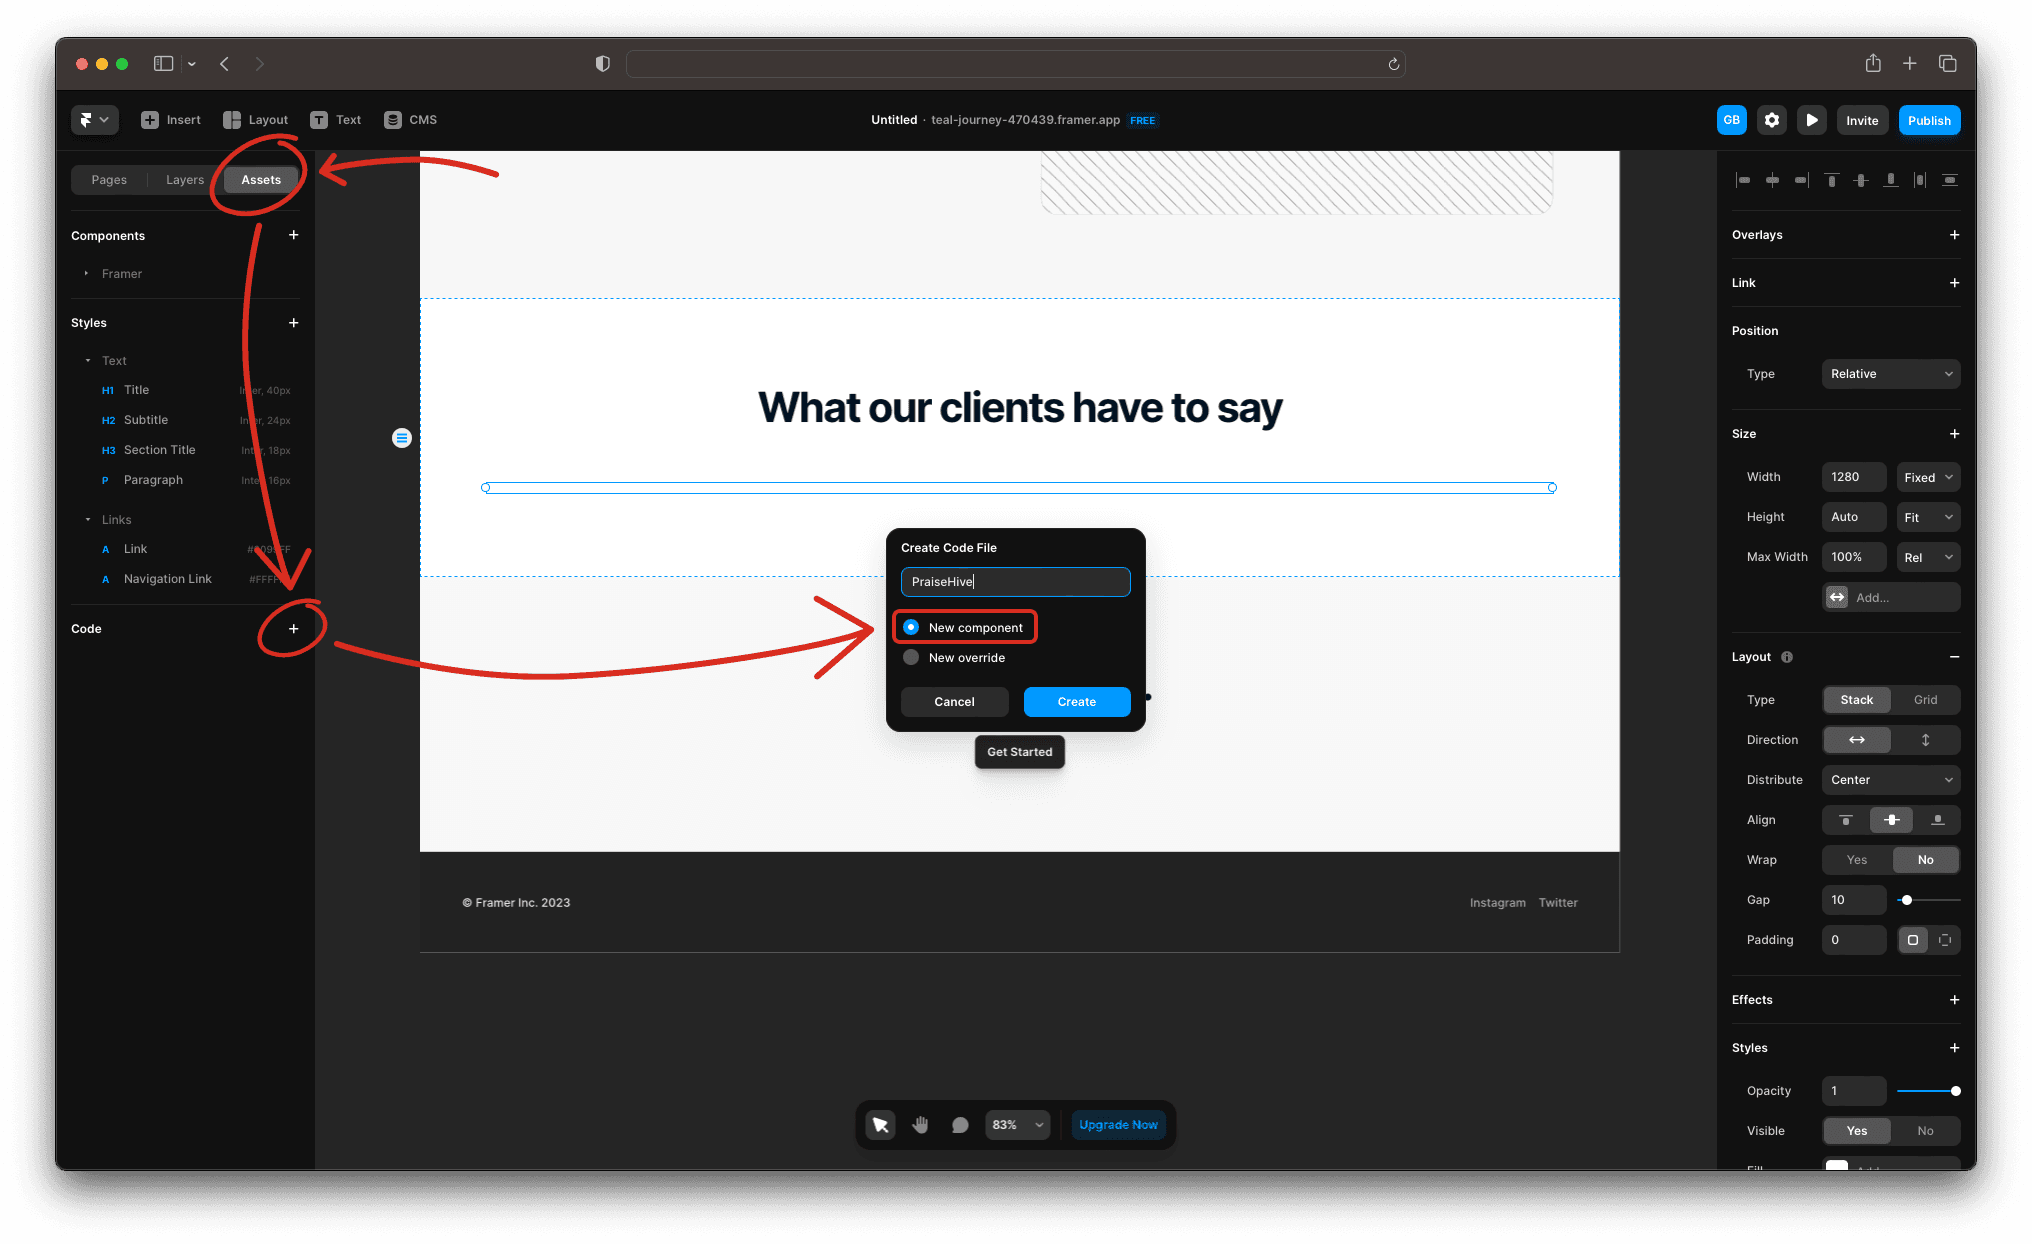
Step 2 - Add the widget inside your Framer page
In your Framer canvas, edit the page you want your testimonials to be displayed in. Navigate to the Assets tab, click on the Code button to create a Code File. A popup will then appear. Name the file PraiseHive and select New component in the options.
In the side panel, select the PraiseHive file you just created and paste the code you copied in the Step 1. Make sure to save the file
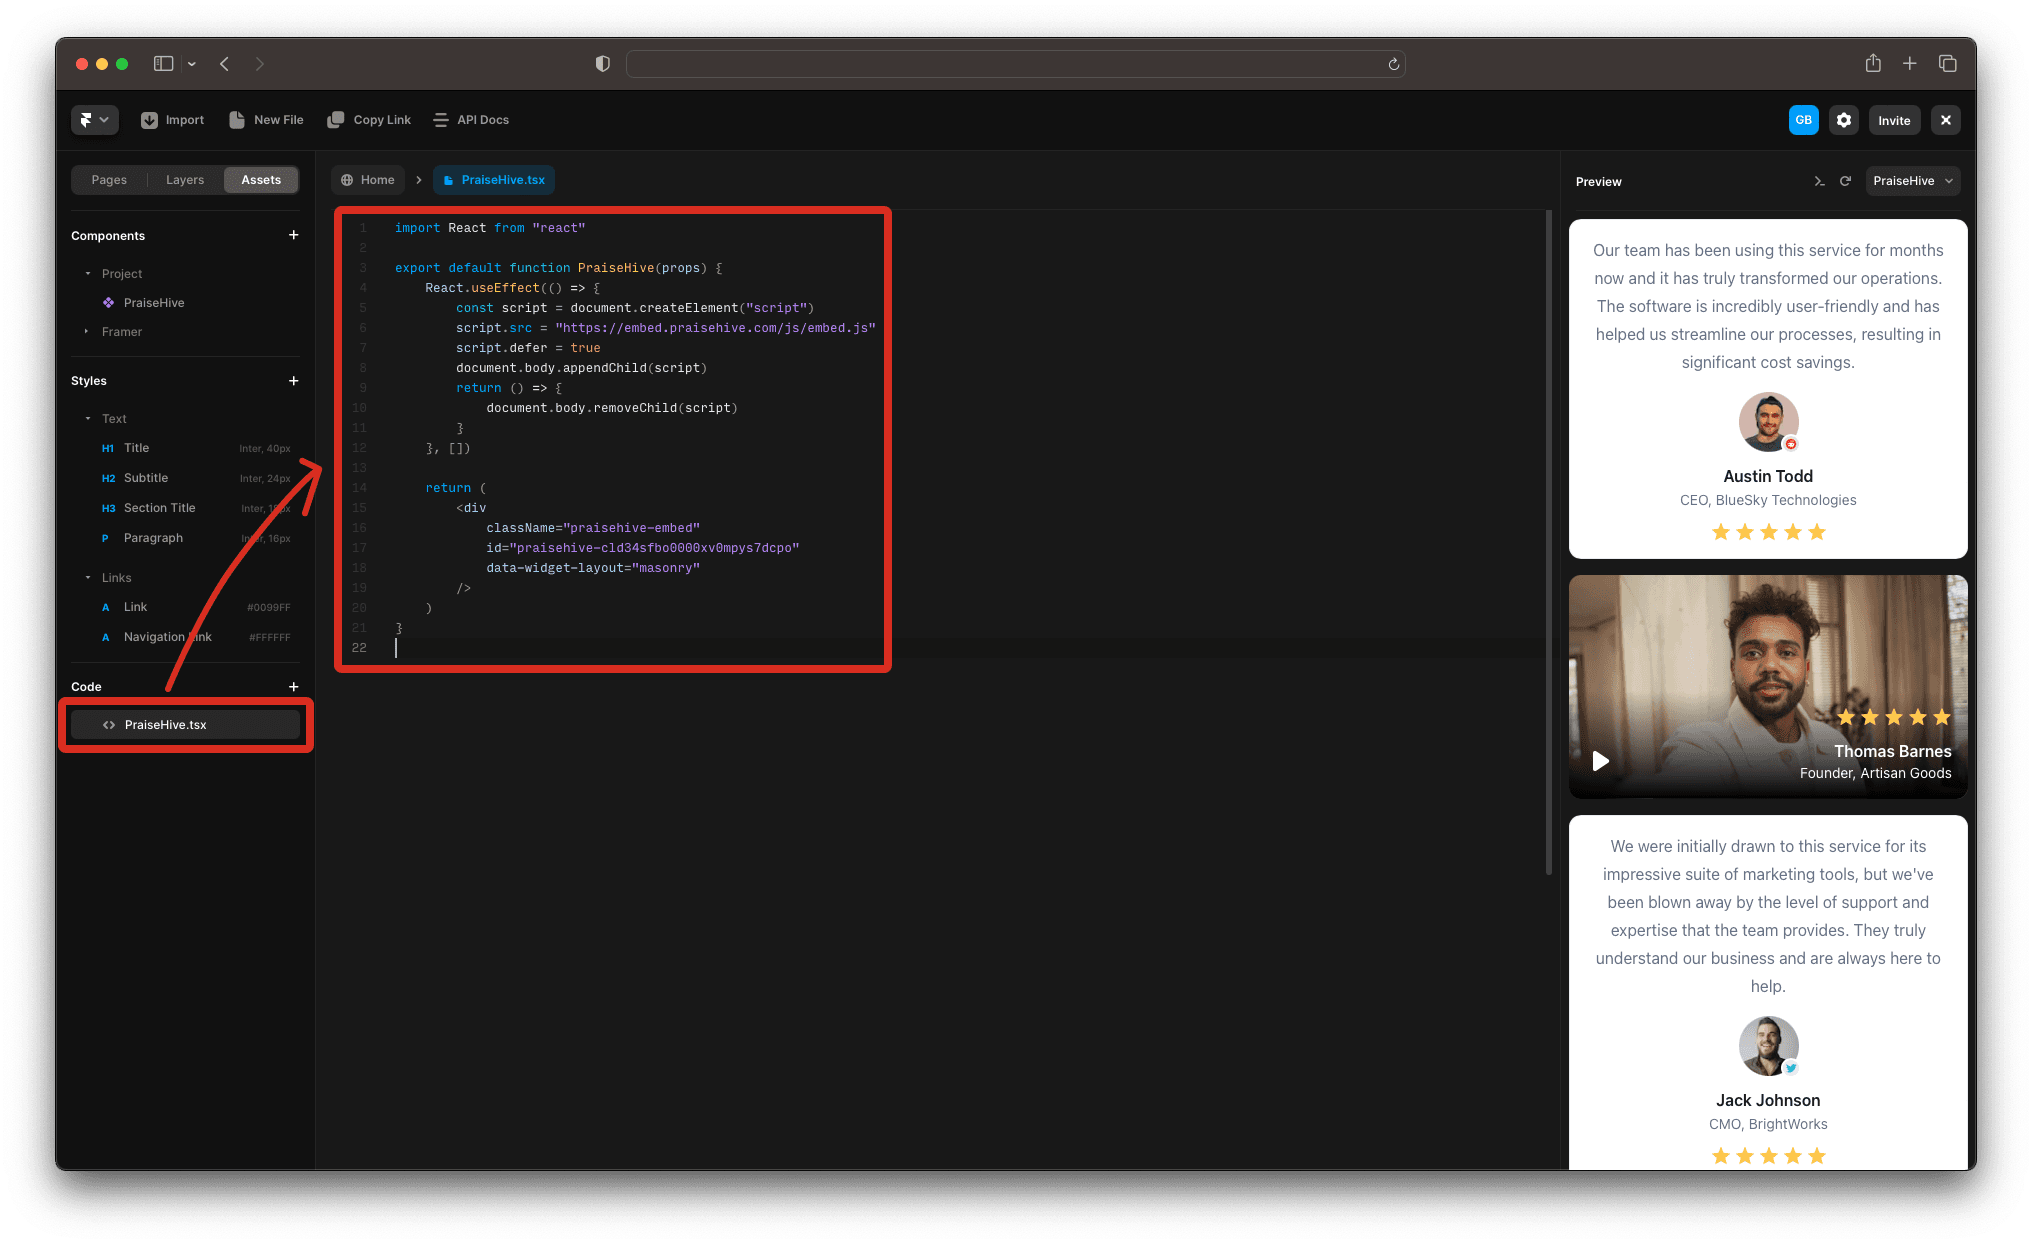
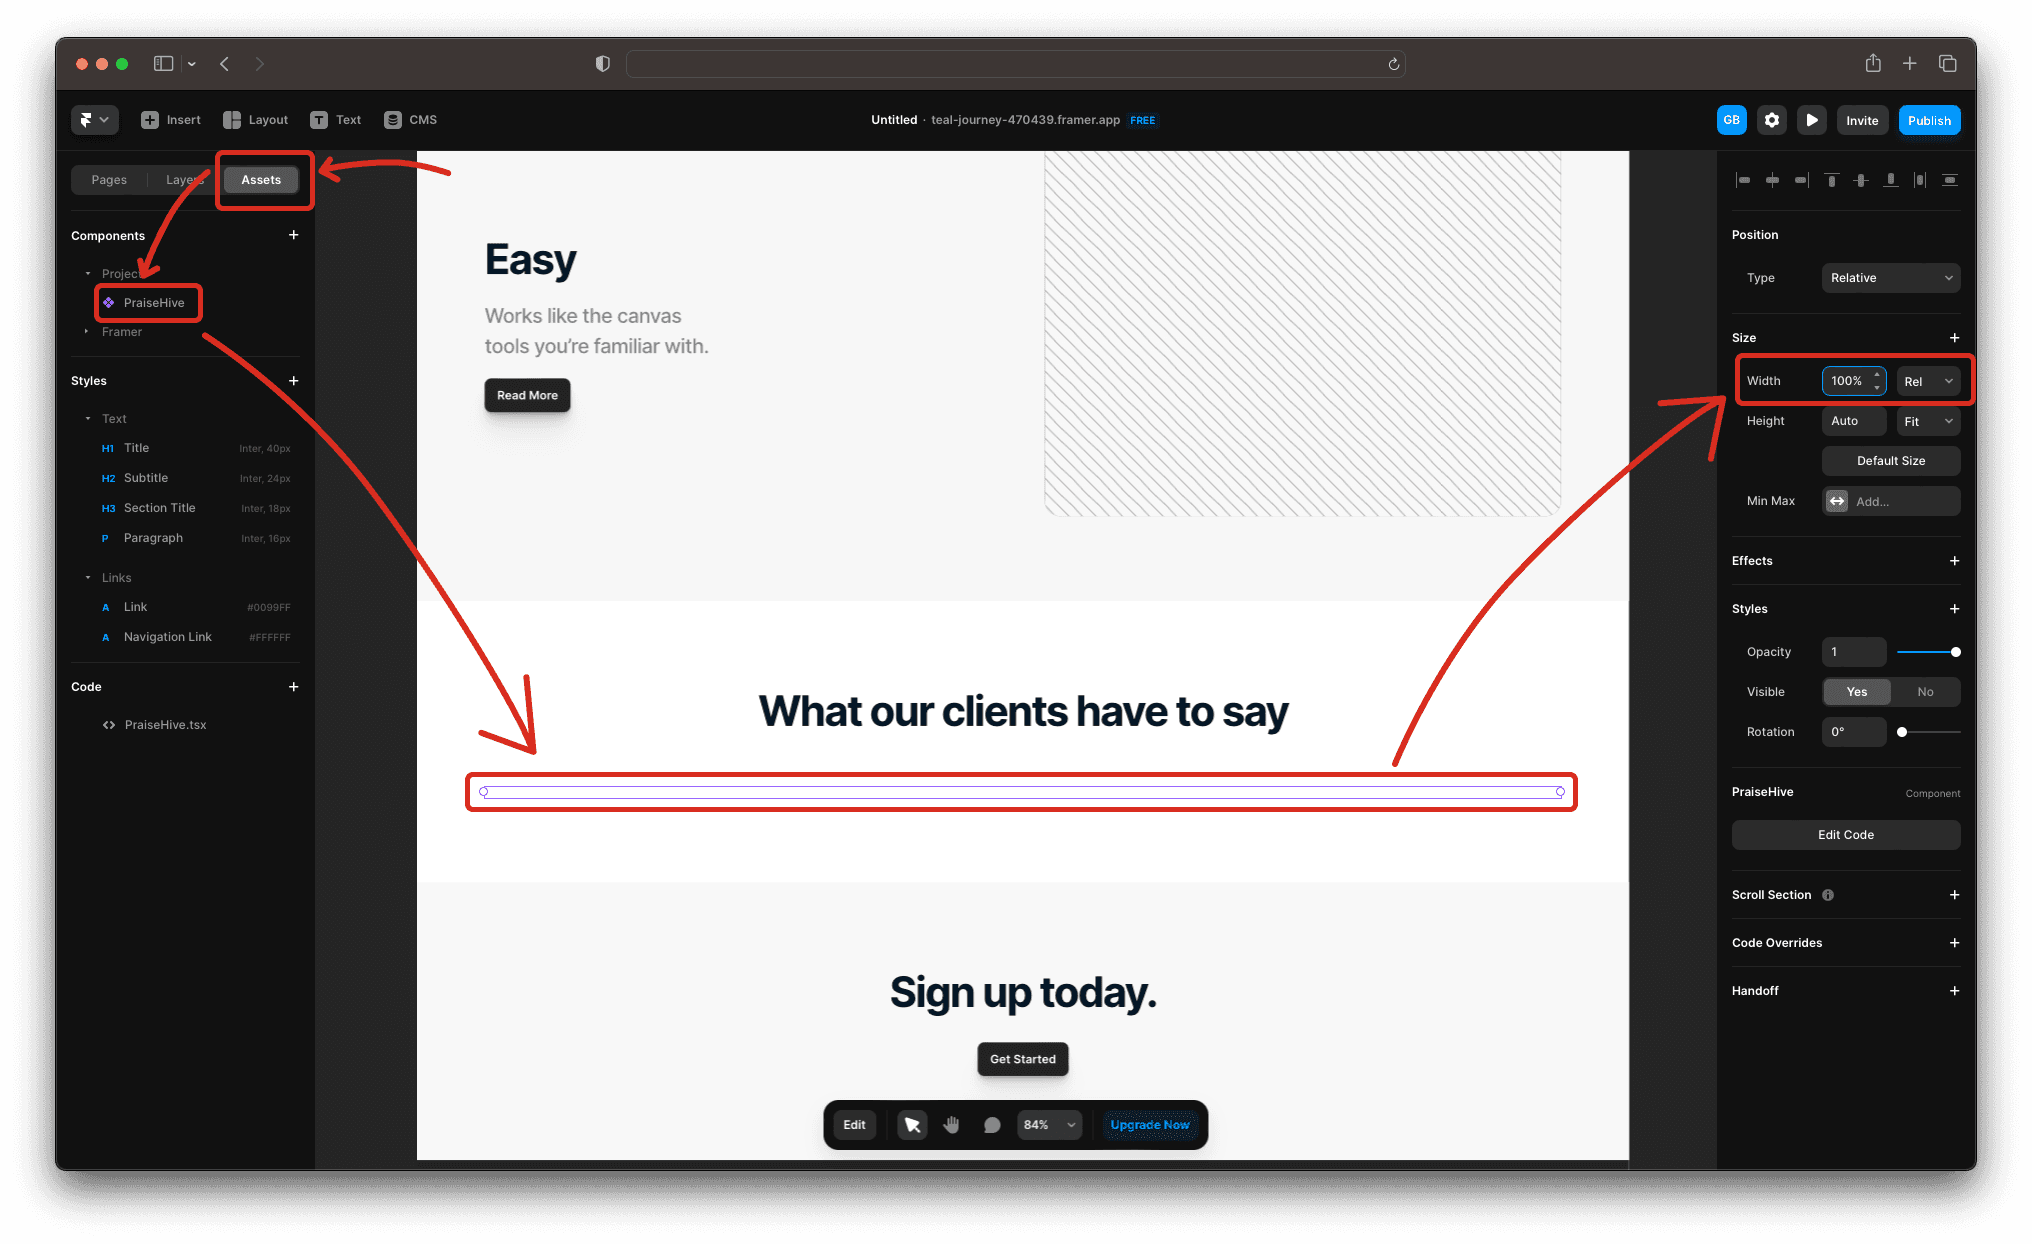
Now that your PraiseHive custom component is fully created, go to your Assets and drag-and-drop the PraiseHive component from your project, to the desired location.
Update the width of the PraiseHive component depending on the type of widget you are embedding:
- Masonry or Carousel: Set the width to
100%->Rel - Avatars: Set the width to
Auto->Fit
Step 3 - Publish your changes
Don't forget to publish your changes on the Framer page, and you will be able to see your testimonials displayed on your website.